At WP SiteKit we provide web design services for business. Every website we design for our clients comes with the ability to search and save stock images for free. These instructions will show you how to find and insert a stock image into your blog post or web page on WordPress.
If we built your website we installed the Instant Images plugin. This is what we’ll be using.
1. Login to WordPress
Make sure you are logged in to your WordPress website.
If you’re unsure how, then see these instructions on How To Log In to Your WordPress Website.
2. Open Instant Images
If you are in the middle of writing a blog post we suggest opening your website in a new tab in your browser to search for your image so you can return to editing your post more quickly.
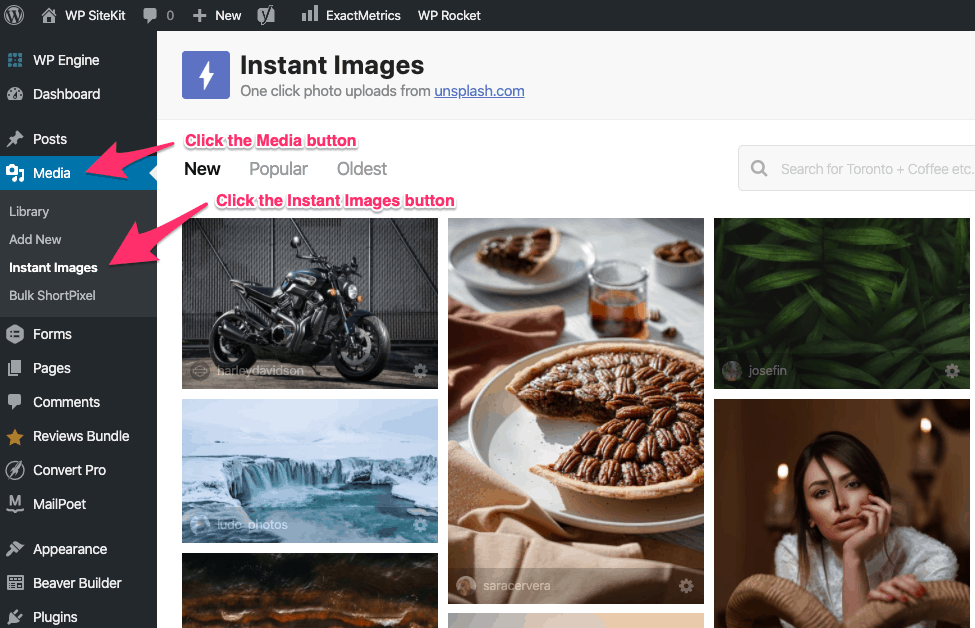
In the WordPress Admin go to Media > Instant Images.
3. Enter Your Search Term
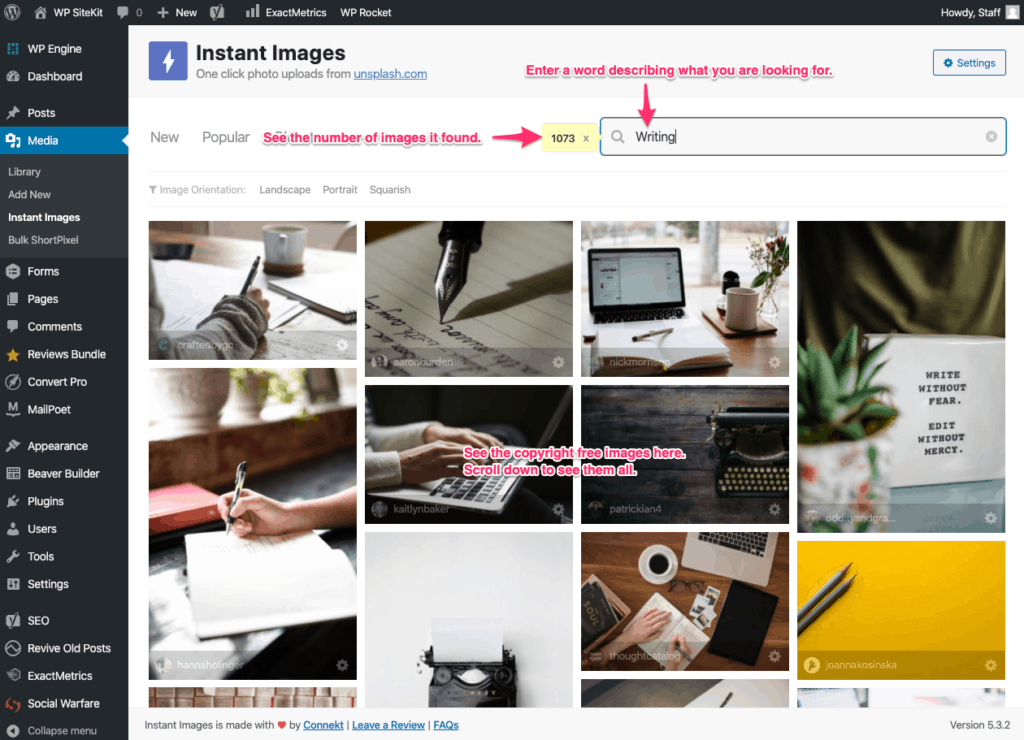
Type your search term into the search bar.
If you use only one word it will display fewer images but more accurate to your term. If you use multiple words it will find more images but will be less accurate to your terms.
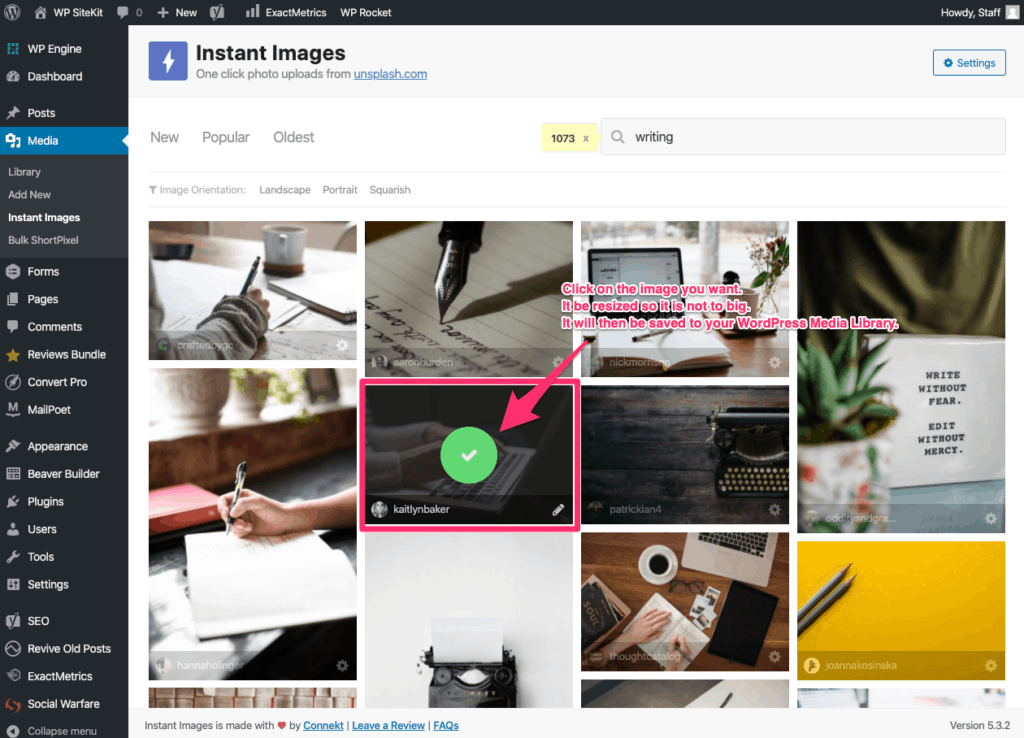
4. Click On The Image You Want To Use
Click on the image you want. Click directly in the middle of the image.
It will automatically be resized (so it’s not too large) and then saved to your WordPress Media Library.
5. You Free Stock Image Now Available
The image is now saved to the WordPress Media Library.
When you go to write a blog post in WordPress you can use the insert image button and find the image in your Media Library.

