Learn how to write and publish a post or article on a WordPress website built by WP SiteKit. It’s a fairly easy process that every website owner should know how to do.
- Log In To WordPress
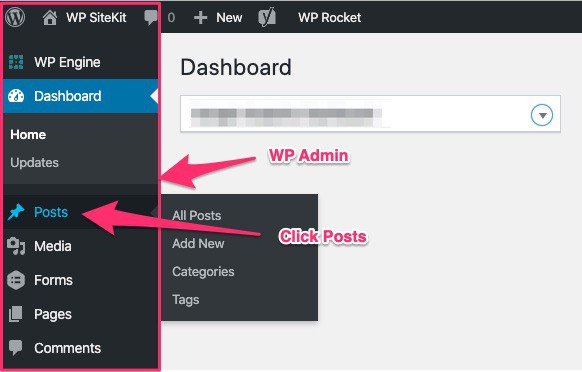
- Go to WP Admin > Posts
- Click the “Add New” button
- Add a Title
- Click the “Use Standard Editor” button in the Beaver Builder box
- Start typing or copy/paste your blog article content
- Add Images (optional)
- Set a Featured Image
- Check the Author and Category
- Publish the Post
- View new post by going to your blog
1. Login to WordPress
In your browser, go to “YOURWEBSITE.COM/wp-admin”. If you are not logged in already WordPress will ask you to log in.
Enter your username and password.

See more detailed instructions on logging into your WordPress website here.
2. Go To WP Admin > Posts
In the WP Admin section click the “Posts” button
3. Click the “Add New” button
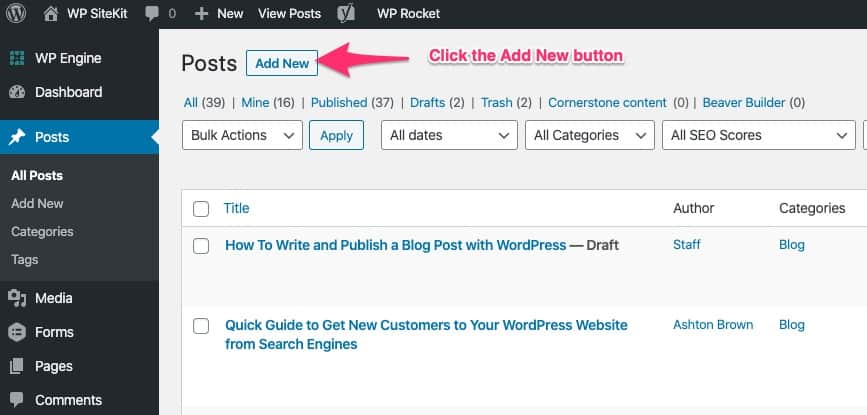
At the top of the Posts page click the “Add New” button.
4. Add a Title
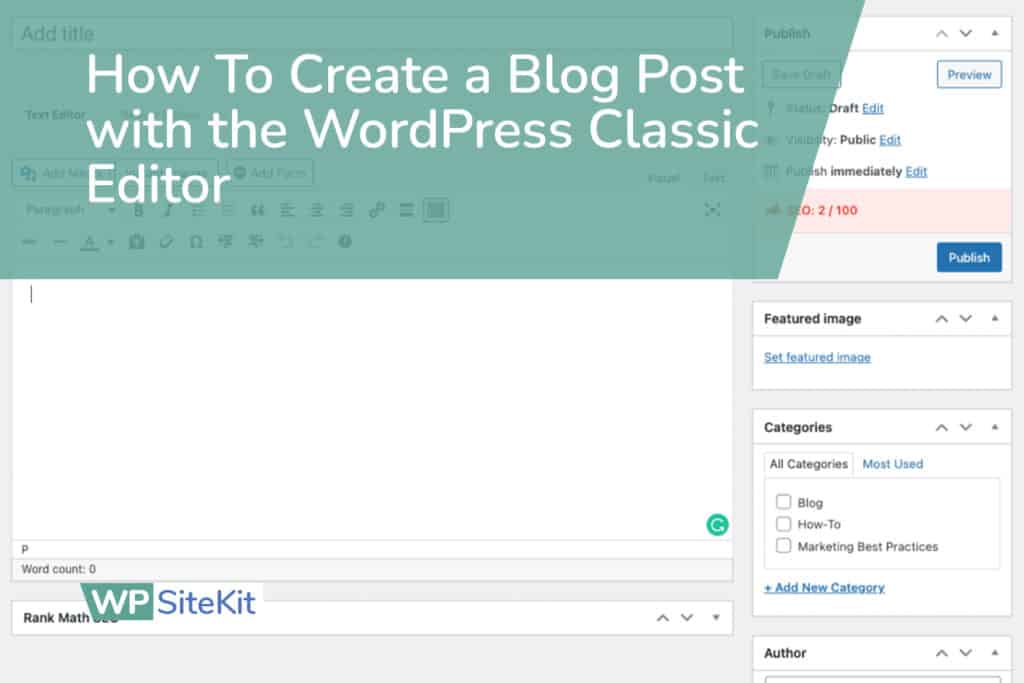
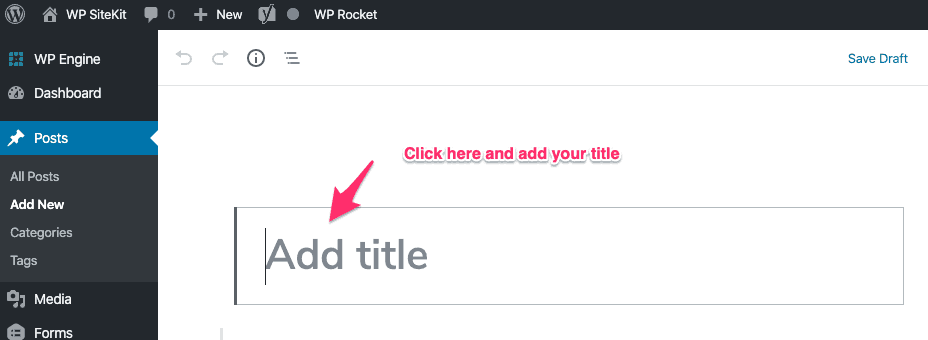
Click in the field at the top where it says “Add title” and start typing or paste your title.
5. Click the “Use Standard Editor” button in the Beaver Builder box
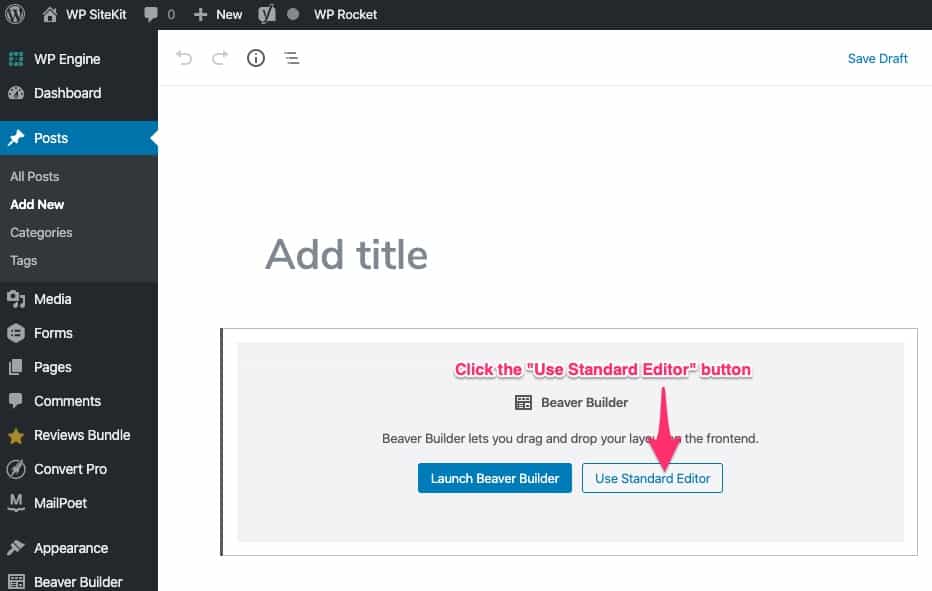
Click on the button that reads “Use Standard Editor”. This will open the default WordPress writing editor. Beaver Builder is used by web designers to layout more complex pages.
6. Start typing or copy/paste your blog article content
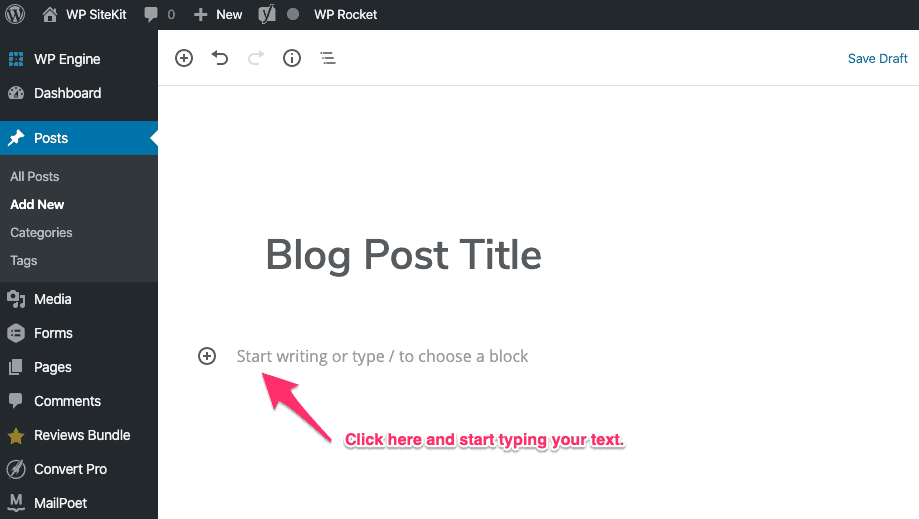
Click in the area below the title then you should see a blinking cursor. Stary typing your post text or copy/paste your text.
To start a new paragraph press Enter or Return on your keyboard.
7. Add Images (optional)
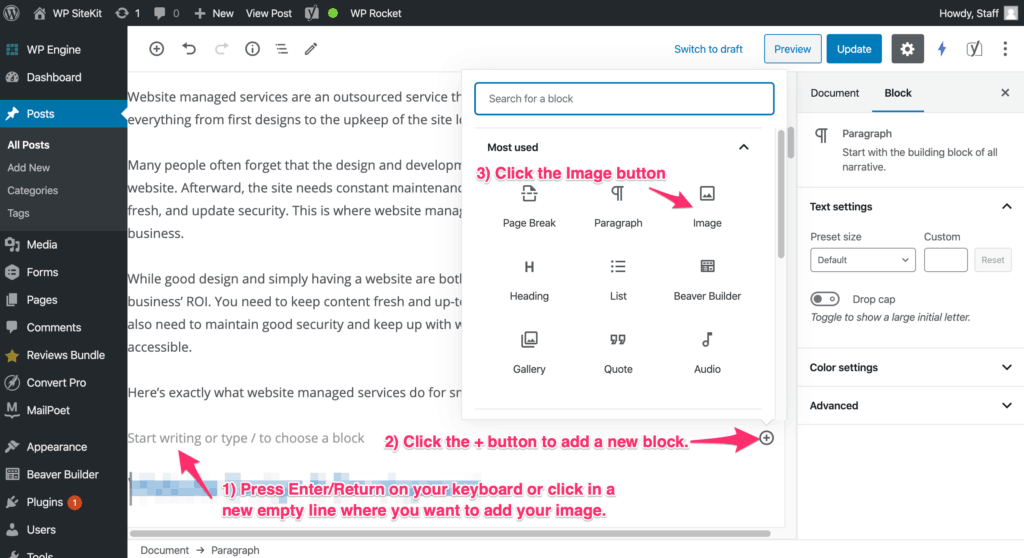
When you press the Enter or Return key on your keyboard you will start a new line of text or “WordPress Block”. When you hover over this Block you will see New Image button appear on the right. Click the New Image button to add an image.
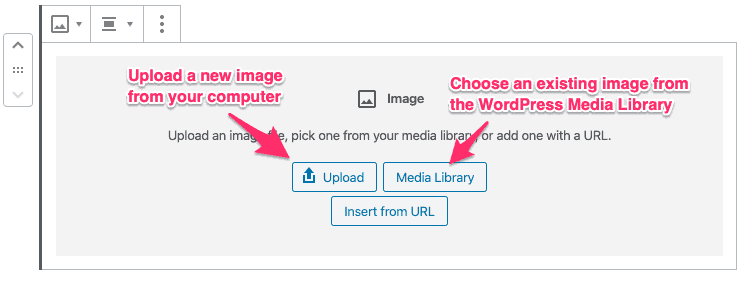
You can either upload a new image or add an image that is already in your WordPress Media Library.
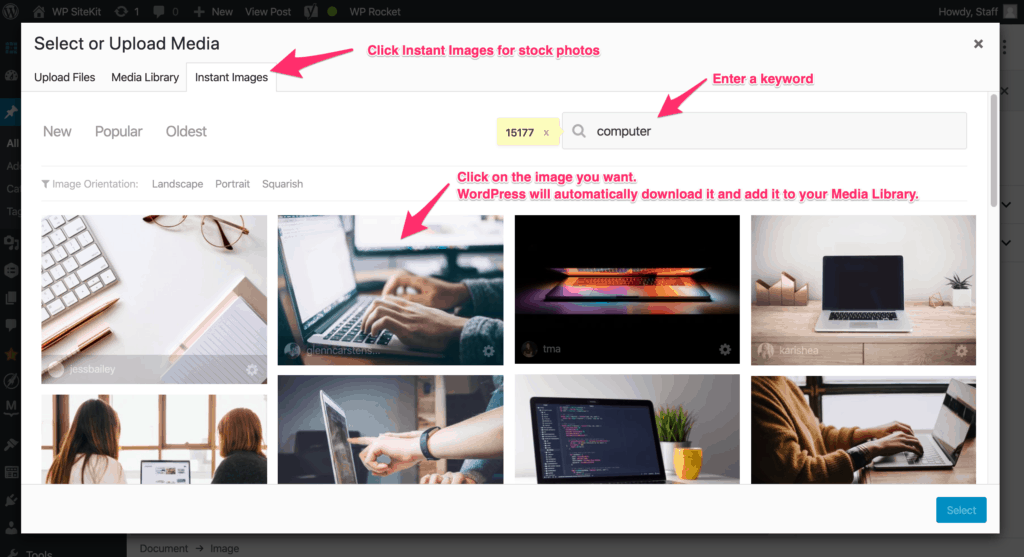
You can also use images from stock photo library because we’ve installed the Instant Images plugin.
Click on the Instant Images tab
Enter a search keyword.
Click on the image to automatically download it to your WordPress Media Library.
8. Set a Featured Image
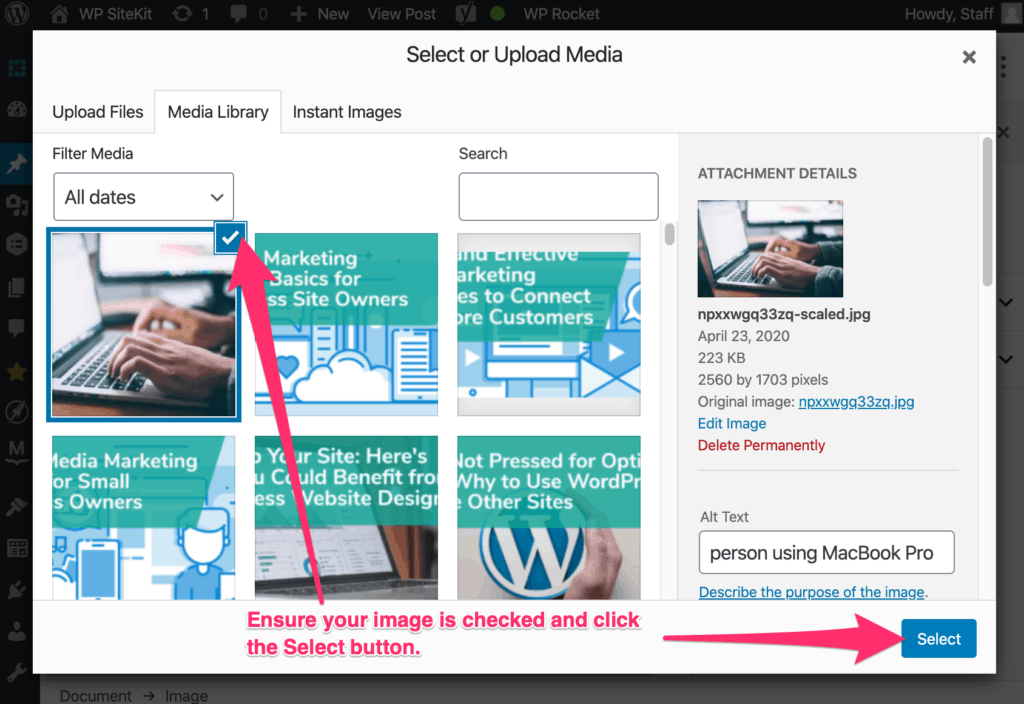
The Featured Image is an image that is displayed on the Blog page that displays all the blog posts. The Featured Image is also displayed at the top of the post. It’s advised to choose an image that summarizes the post or post title.
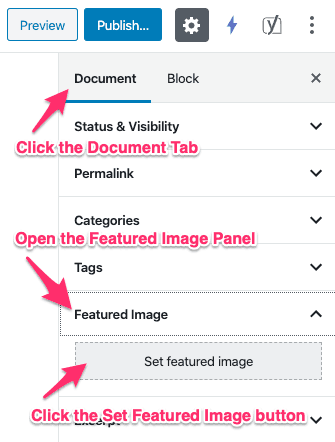
Click the Documents tab in the sidebar. Click the Featured Image panel to open it. Click the Set Featured Image button and choose a featured image by uploading or from the Media Library.
9. Check the Author and Category
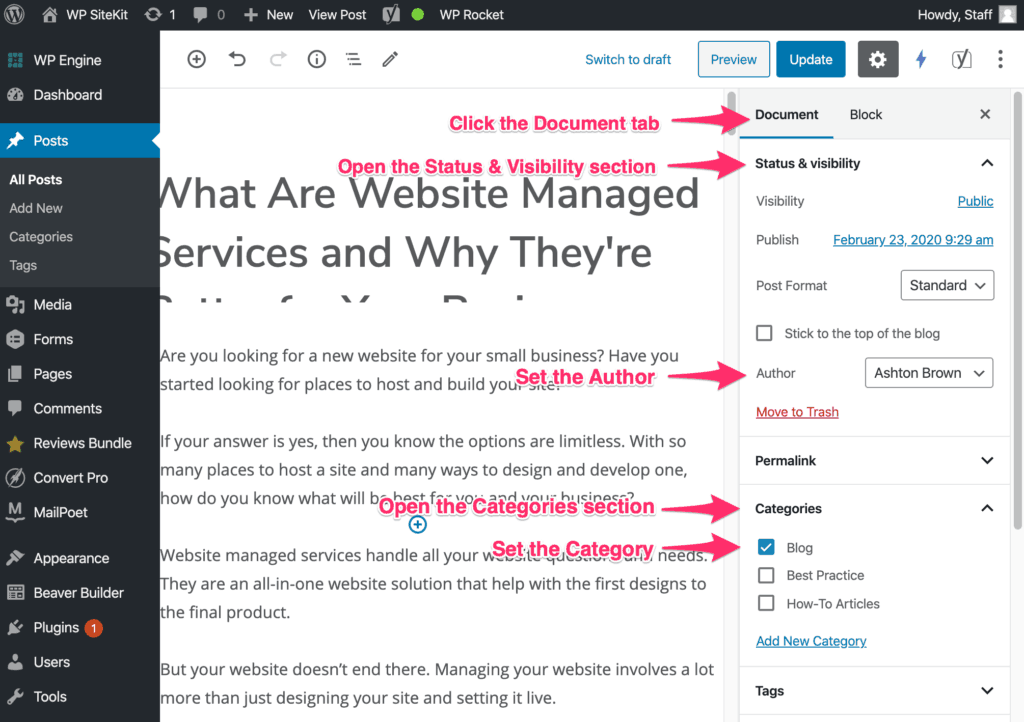
The default settings for Author and Category are typically set properly when you create a new blog post. However you should double check them and change them if necessary.
You will find sections for Author and Category in the document settings section on the right side of the screen.
10. Publish the Post
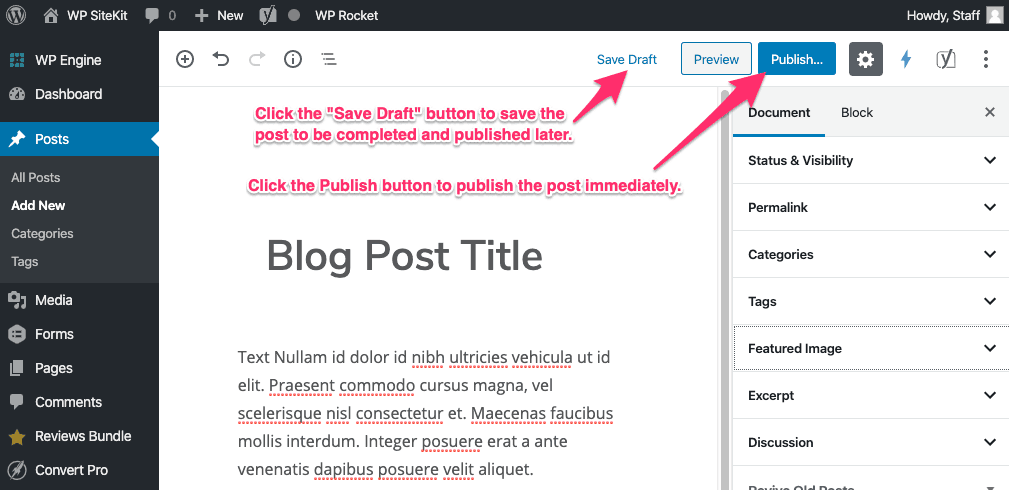
In the top right corner click the “Publish” button. This will open the publishing panel. Then click the “Publish” button again.
Optionally you can click the “Save Draft” button to save the post to be completed and published at a later date.
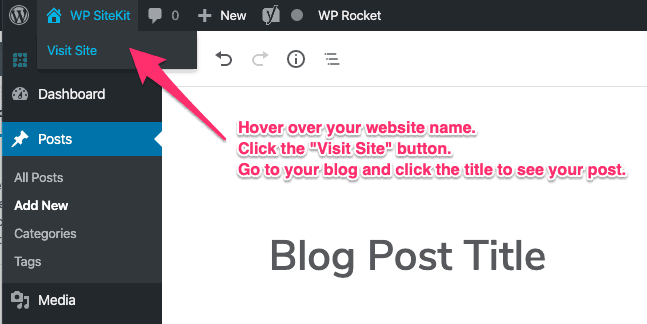
11. View new post by going to your blog
Hover over your website name.
Click the “Visit Site” button.
Go to your blog and click the title to see your post.
