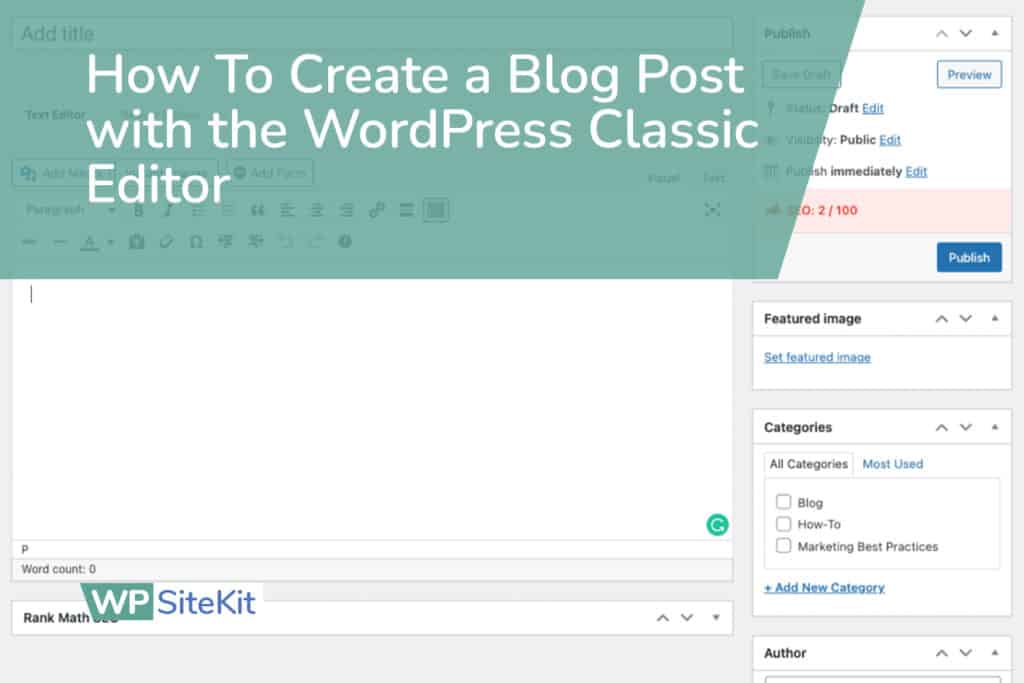
Learn how to write and publish a post or article on a WordPress website built by WP SiteKit. It’s a fairly easy process that every website owner is capable of doing. We typically install the WordPress Classic Editor plugin to replace the Standard Editor because the Classic Editor is easier to use.
- Log In To WordPress
- Go to WP Admin > Posts
- Click the “Add New” button
- Add a Title
- Start typing or copy/paste your blog article content
- Add Images (optional)
- Set a Featured Image (recommended)
- Check the Author and Category
- Publish the Post
- View the new post by going to your blog
1. Log in to WordPress
In your browser, go to “YOURWEBSITE.COM/wp-admin”. If you are not logged in already WordPress will ask you to log in.
Enter your username and password.

See more detailed instructions on logging into your WordPress website here.
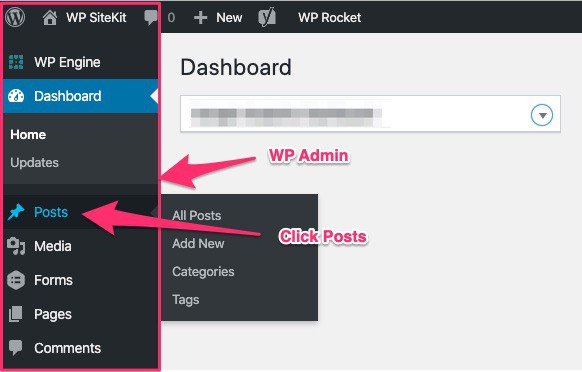
2. Go To WP Admin > Posts
In the WP Admin section click the “Posts” button
3. Click the “Add New” button
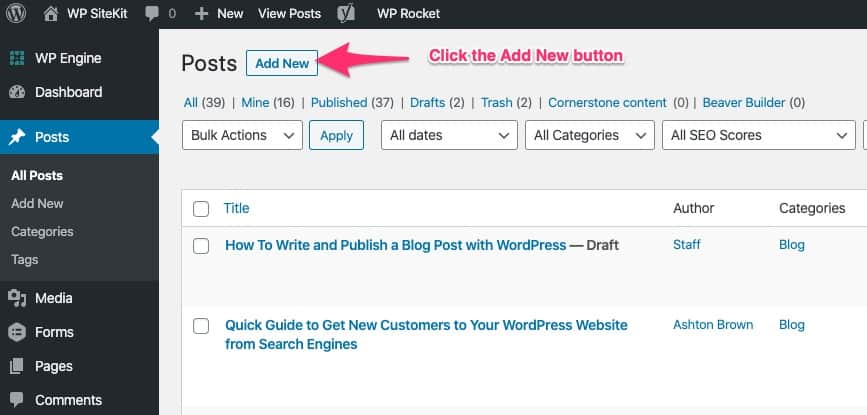
At the top of the Posts page click the “Add New” button.
4. Add a Title
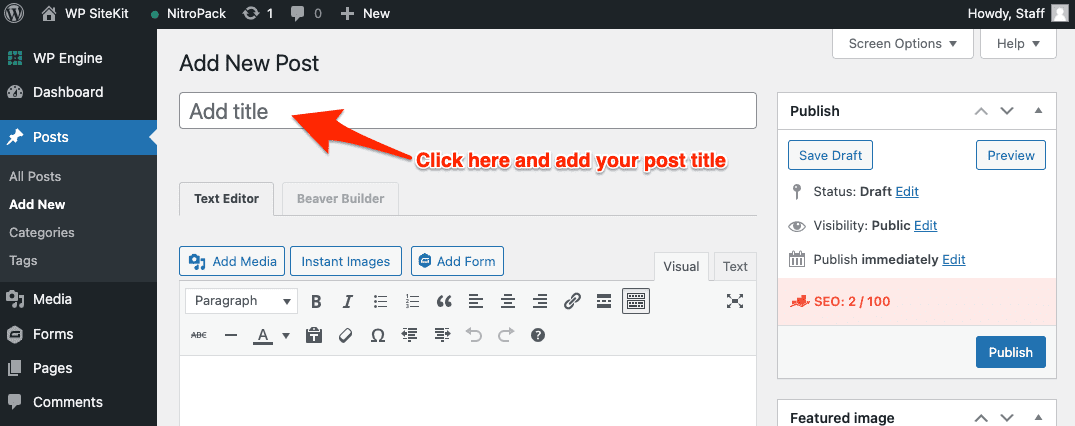
Click in the field at the top where it says “Add title” and start typing or pasting your title.
5. Start typing or copy/paste your blog article content
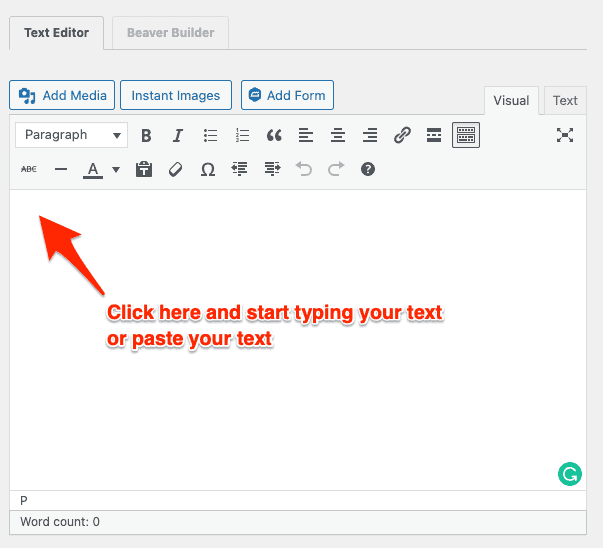
Click in the white box in the Text Editor, then you should see a blinking cursor. Stary typing your post text or copy/paste your text.
6. Add Images (optional)
In a later section in these instructions, we will show you how to add an image to the very top of your blog post called a Featured Image. If you only want to add 1 image to your post at the top we recommend you skip this section and use the Featured Image instructions. However, if you want to add multiple images throughout your post these instructions will teach you how.
Place the cursor in the location in the blog post where you want t place your new image.
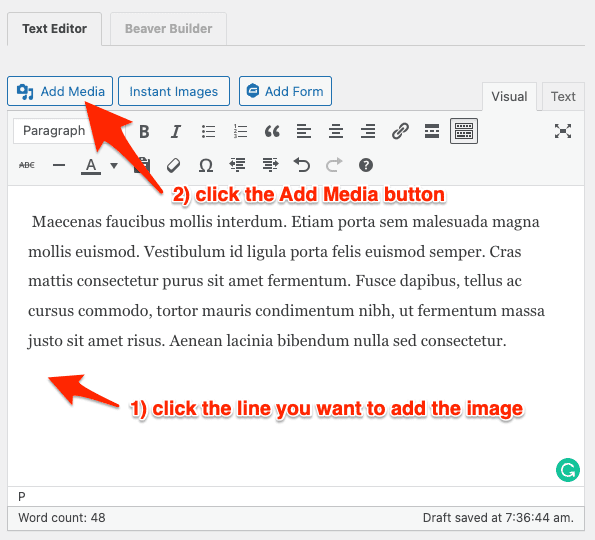
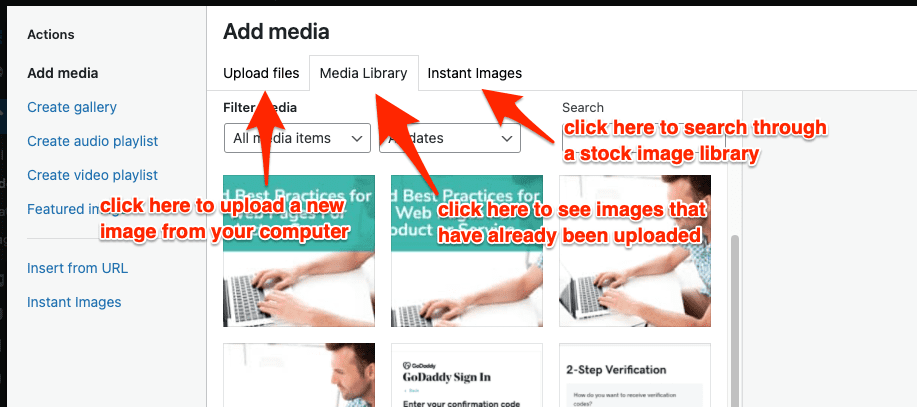
Choose whether to upload a new image, use an image that is already uploaded, or search for an image in a new stock photo library.
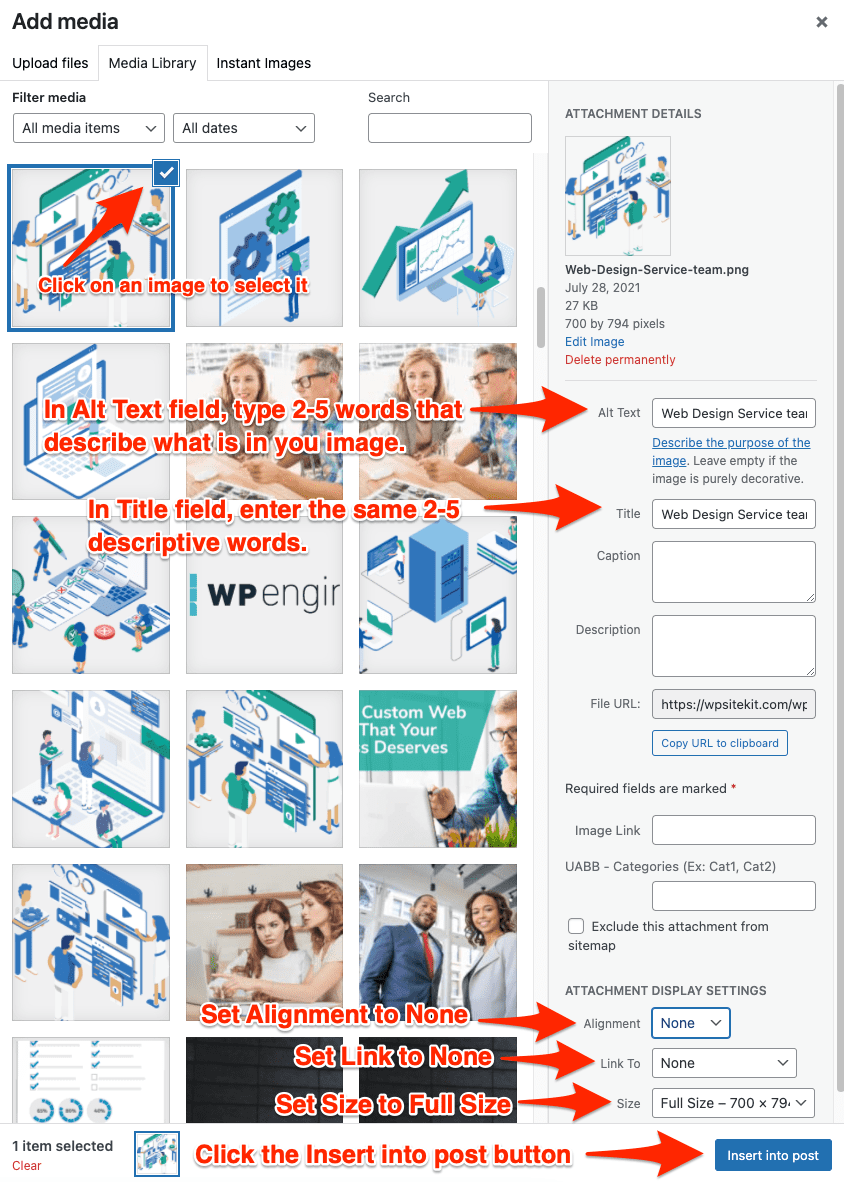
Choose the image you want to use.
Enter the Alt Text and Title.
In Attachment Display Settings set the following:
- Alignment: None
- Link To: None
- Size: Full Size
Click the Insert into post button
7. Set a Featured Image (recommended)
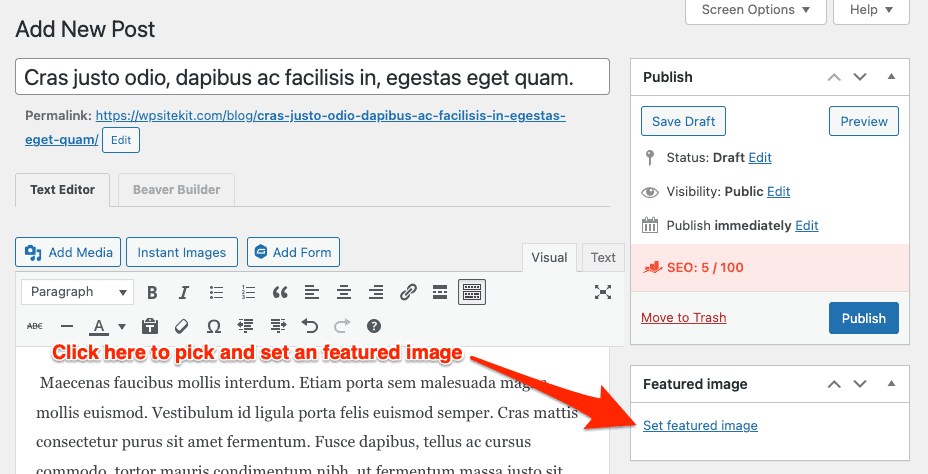
We recommend always setting a featured image. This will add an image to the top of your blog post and as a preview image on the blog start page and when shared on social media.
Follow the same instructions as the Add Images instructions above.
8. Check the Author and Category
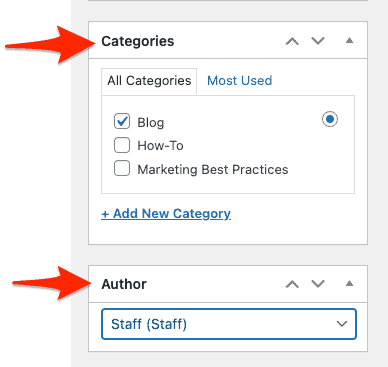
The default settings for Author and Category are typically set properly when you create a new blog post. However, you should double-check them and change them if necessary.
9. Publish the Post
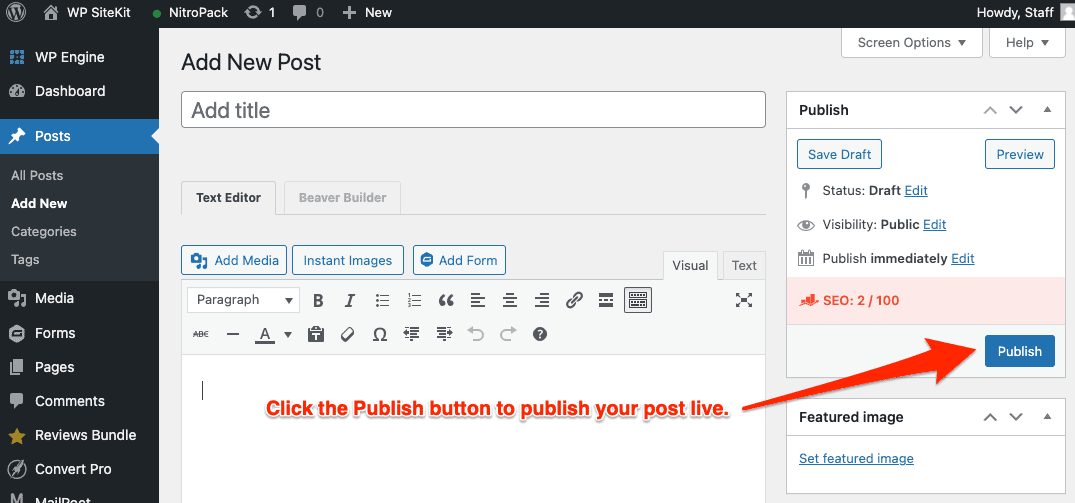
Click the Publish button in the top right to publish your post live.
10. View the Post
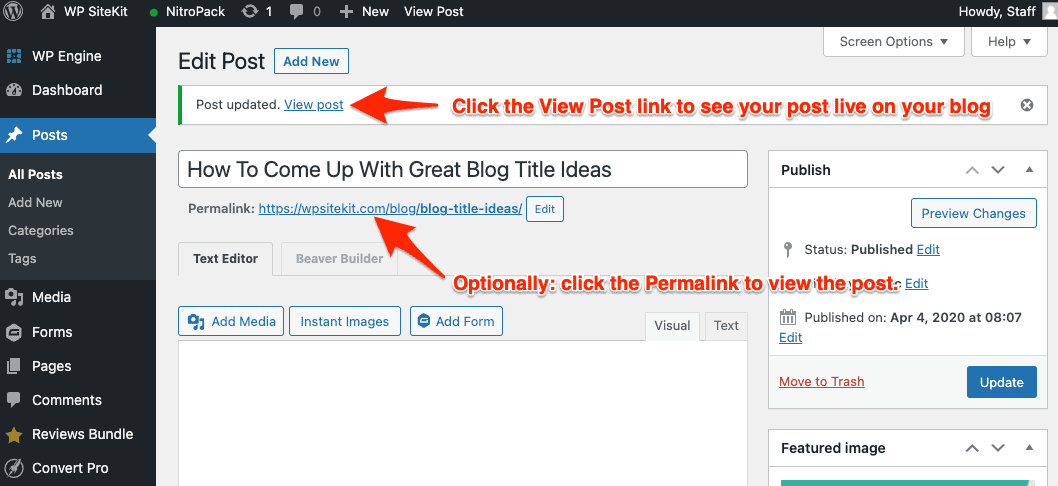
Click the View Post link to see your post live on your blog
Optionally you can click the Permalink to view the post.
