In this article will show you how to edit the different menus in WordPress. The WordPress menu system can be configured many different ways but the websites we build at WP SiteKit are typically set like the example in this article.
Here are the general steps to edit the menu in WordPress:
- Log In To WordPress
- Open the menu editor in WP Admin > Apperance > Menus
- Select the menu you want to edit
- Select the page you want to add and click the Add to Menu button
- Drag the button to the correct placement
- Click the Save Menu button
1) Log In To WordPress
Make sure you are logged in to your WordPress website.
If you’re unsure how then see these instructions on How To Log In to Your WordPress Website.
2) Open the Menu Editor
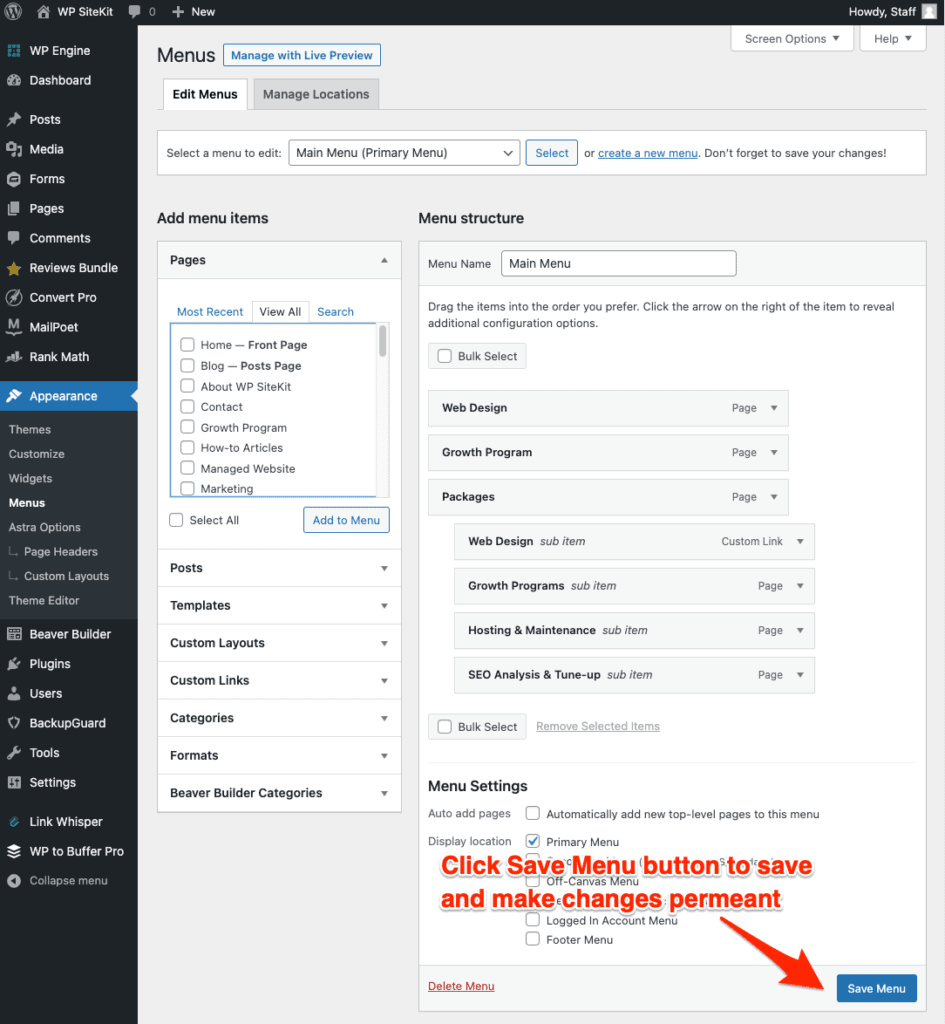
In WordPress go to WP Admin > Appearance > Menus
3) Select the menu you want to edit
These are the menu names when looking at the website from the front end.

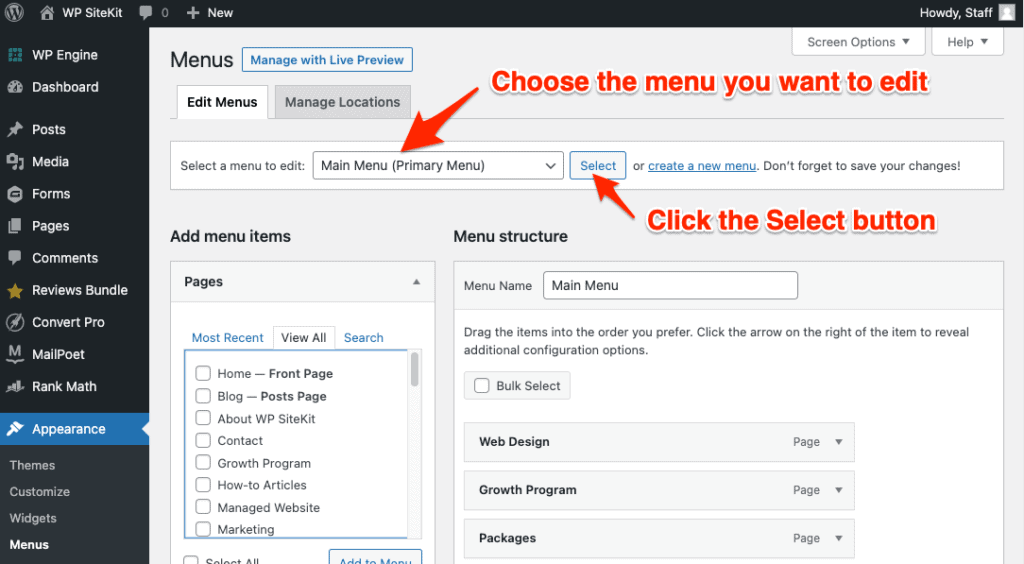
Select a menu to edit by choosing the correct one in the dropdown menu. Then click the Select button.
4) Select the Page and Add to Menu
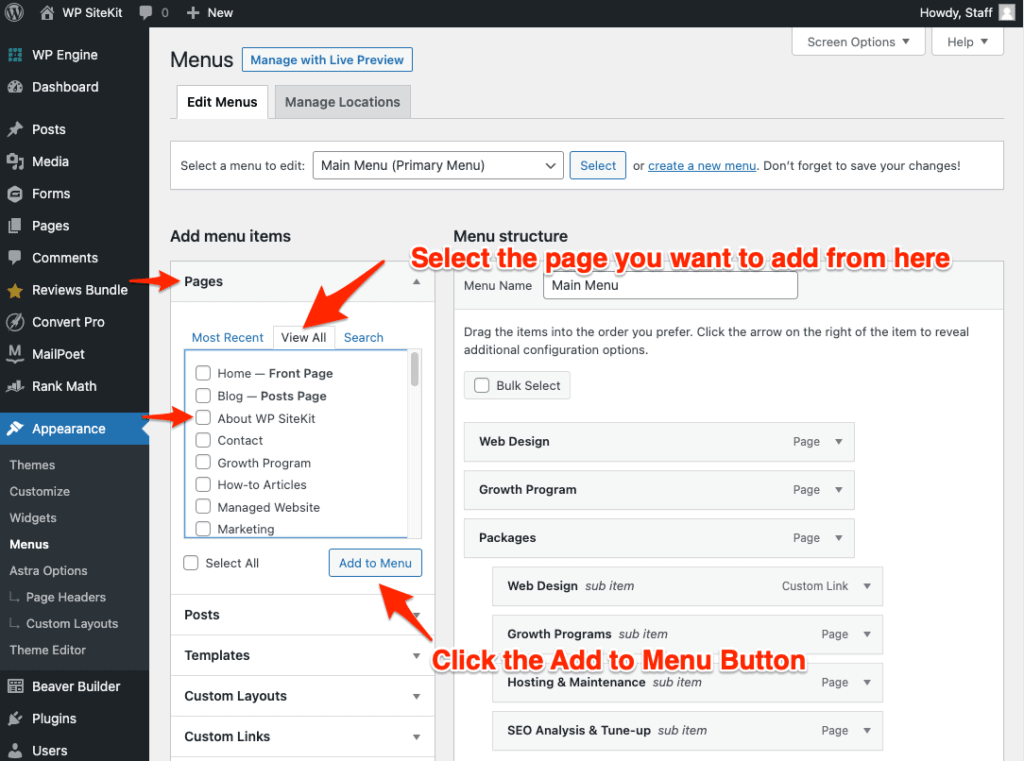
Select the page you want to add and click the Add to Menu button.
5) Drag the button to the correct placement
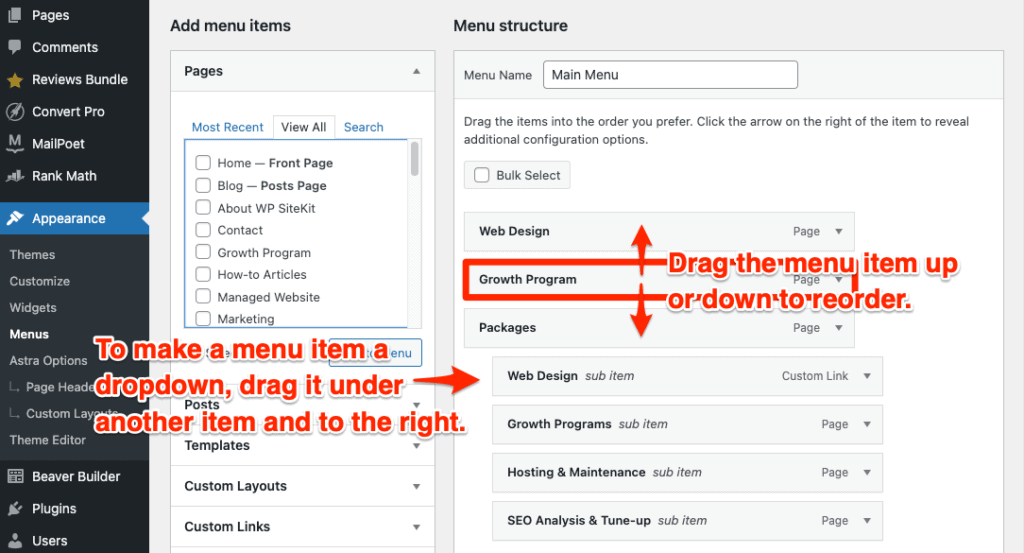
Drag the menu item up or down to reorder.
To make a menu item a dropdown, drag it under another item and to the right.
Click the Save Menu Button
